How to Get Rid of Bed Bugs: A Safe, Realistic Plan
- Confirm, contain, combine methods, and keep monitoring
- The treatment plan at a glance
- Step 1: Confirm the identification
- Step 2: Define the affected area
- Step 3: Contact the right people early
- Step 4: Contain without relocating the infestation
- Step 5: Use dryer heat correctly
- Step 6: Vacuum as reduction, not eradication
- Step 7: Isolate and monitor the bed
- Step 8: Understand controlled heat, steam, and cold
- Step 9: Use pesticides only by the label
- Why foggers are not a solution
- Step 10: Monitor and follow up
- What DIY work can and cannot do
- The realistic endpoint
Confirm, contain, combine methods, and keep monitoring
Getting rid of bed bugs requires an integrated plan, not one spray. First confirm the insect, map every affected sleeping or resting area, and prevent belongings from carrying bugs into clean rooms. Then combine physical removal, dryer heat, encasements, interceptors, targeted professional heat or steam where appropriate, and only pesticides legally labeled for indoor bed bug control. Reinspect repeatedly because eggs or hidden bugs can survive an incomplete pass.
An established infestation usually needs an experienced licensed pest professional. Call early if you find multiple life stages, more than one affected room, activity in an apartment or shared building, bugs after a prior treatment, or occupants who cannot safely prepare the space. Do-it-yourself preparation can make professional treatment work better; it should not become unsafe experimentation.
The treatment plan at a glance
| Phase | Goal | Useful actions | Do not do |
|---|---|---|---|
| Confirm | Treat the correct pest | Capture specimen, photograph scale and location, professional ID | Spray unexplained bites or stains |
| Contain | Avoid spreading | Bag before moving, keep sleeping area stable, notify building contact | Move loose items or start sleeping elsewhere |
| Reduce | Remove bugs and hiding places | Dryer heat, careful vacuuming, encasements, decluttering in bags | Carry unbagged clutter through the home |
| Treat | Reach bugs and eggs | Professional IPM, controlled heat/steam, label-compliant pesticides | Space heaters, outdoor pesticides, overapplication, mixtures |
| Monitor | Detect survivors or reintroduction | Interceptors, inspections, follow-up visits, dated records | Declare success after one quiet night |
Step 1: Confirm the identification
Preserve a specimen under clear tape, in a vial, or in a sealed bag. Record its actual length and exact hiding place. Look for live insects, pale eggs, shed skins, dark fecal spots, and rusty stains around mattress seams, the bed frame, box spring, headboard, nearby furniture, and other sleeping areas.
The appearance and evidence guide separates bed bugs from fleas, ticks, beetles, and closely related bat or bird bugs. A qualified pest professional or local extension identification service should confirm an ambiguous specimen. Bites alone are not proof.
Do not apply pesticide before confirmation. Treating the wrong pest wastes time, creates exposure, can destroy useful evidence, and may drive surviving insects into harder-to-reach cracks.
Step 2: Define the affected area
Inspect every place where people regularly sleep or rest, including sofas and recliners. Ask household members about sightings without assuming that everyone reacts to bites. In multi-unit housing, adjoining units may require coordinated inspection because treating one room in isolation can miss movement through the structure.
Write down:
- rooms with confirmed bugs or physical signs;
- date and location of each specimen;
- life stages observed;
- furniture and belongings that moved recently;
- travel, secondhand furniture, or guest exposure that may matter;
- prior pesticide or heat treatment;
- occupants, pets, health constraints, and accessibility needs relevant to preparation.
This is a treatment map, not a blame exercise. Bed bugs hitchhike in belongings and occur in clean as well as cluttered spaces.
Step 3: Contact the right people early
For a rental, dormitory, shelter, hotel, or other managed building, notify the responsible housing or property contact promptly and in writing. Ask for the current inspection and preparation process. Do not carry a loose specimen into an office; send photographs and offer a sealed sample as directed.
Landlord and tenant duties, notice periods, access rules, and payment vary by state, province, city, lease, and housing program. Check current local housing, tenant, public-health, or code-enforcement resources. Do not withhold rent, discard property, or arrange structural pesticide work based only on general online advice.
When hiring a professional, look for current licensing where required, specific bed bug experience, an inspection before quoting a treatment plan, integrated pest-management methods, written preparation instructions, follow-up visits, and a clear explanation of what success monitoring includes. The EPA's professional-hiring guidance advises planning for multiple visits because very few infestations are controlled with one treatment.
Step 4: Contain without relocating the infestation
Keep belongings in the affected room unless they are sealed before moving for treatment. Use sturdy bags or lidded containers and label them “untreated” or “treated.” Do not carry laundry in an open basket through the home.
Continue sleeping in the same location unless the professional or a safety concern requires otherwise. Moving to a sofa or another bedroom can draw bugs toward a new resting area and expand the infestation. Do not move furniture to a hallway, curb, neighbor, or storage unit without the professional's containment instructions.
Reduce clutter methodically. Bag items before sorting; do not create open piles. Discard only what cannot be safely treated or retained. Mark discarded infested furniture clearly and render it unusable according to local rules so someone else does not take it home.
Step 5: Use dryer heat correctly
For clothing, bedding, curtains, and other dryer-safe items, high dryer heat is a practical killing step. The EPA's current preparation guidance specifies high heat for 30 minutes to kill bed bugs and eggs and warns that washing alone may not do the job.
Bag items before carrying them to the laundry area. Load the dryer without packing it so tightly that items cannot tumble and heat through. Follow fabric and appliance instructions; some materials cannot tolerate high heat. After treatment, move items directly into clean sealed bags or containers and keep them separate from untreated belongings.
If items need washing, the dryer killing step still depends on adequate high-heat exposure. A wet, overloaded load may take time just to dry before contents reach the needed conditions. Ask the pest professional how to sequence washing and drying for your specific load and appliance.
Do not use an oven, microwave, hair dryer, clothes iron, hot car, or improvised heated box for belongings. These methods create fire, damage, and cold-spot risks without verified temperature control.
Step 6: Vacuum as reduction, not eradication
Use a crevice attachment to collect visible bugs, shed skins, and eggs from mattress seams, the bed frame, baseboards, and furniture joints. Scraping lightly along a seam can help dislodge eggs without shredding fabric. Vacuum slowly rather than sweeping bugs into new areas.
Immediately seal the disposable bag or vacuum contents inside another bag and place it in an outdoor trash container. For a bagless machine, follow the manufacturer's safe emptying and cleaning instructions outside. A vacuum may remove many bugs but does not reliably reach every crevice or kill what remains.
Step 7: Isolate and monitor the bed
Pull the bed slightly away from walls. Keep sheets and blankets from touching the floor. Remove stored items from underneath, handling them as potentially exposed rather than moving them loose.
Use bed-bug-rated encasements on the mattress and box spring. The zipper must close completely and the material must remain intact; inspect for tears. Encasements trap bugs already inside and remove folds as hiding places, but they do not kill bugs elsewhere in the room.
Place purpose-built interceptors under each bed or furniture leg when compatible with the frame. Keep them clean, inspect on a schedule, and record findings. Interceptors support detection and population reduction; an empty trap does not by itself prove eradication.
Step 8: Understand controlled heat, steam, and cold
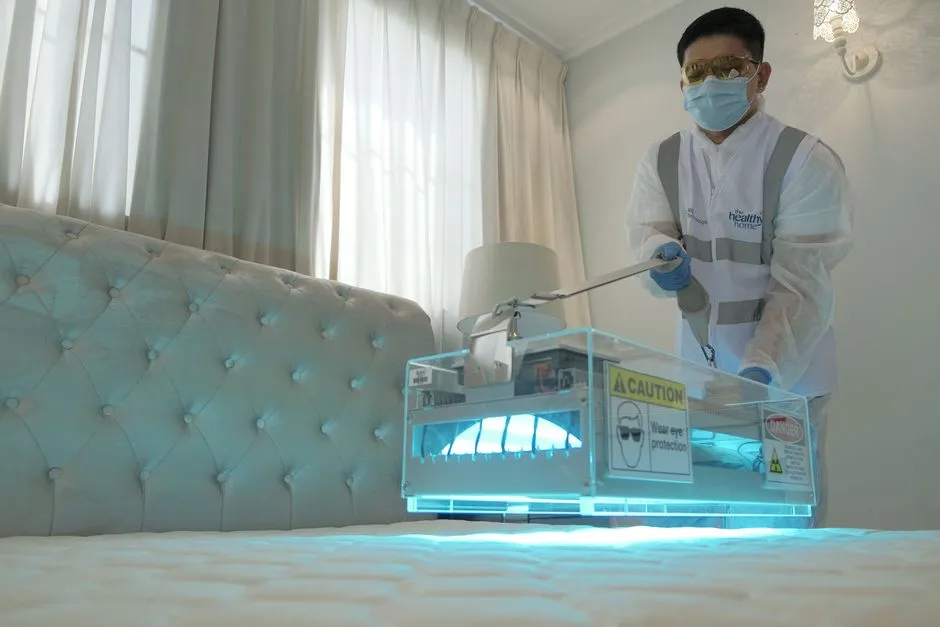
Whole-room or contained heat succeeds only when the lethal temperature reaches every hiding place and item for the required time. The EPA's current integrated pest-management guide states that infested items or areas should reach at least 120°F (about 49°C) for 90 minutes to ensure eggs are killed.
That is not permission to turn up a thermostat or bring in propane heaters, fireplaces, or space heaters. Those approaches are ineffective and dangerous, can start fires or create carbon-monoxide hazards, and leave cool pockets where bugs survive. Professional heat treatment uses designed equipment, temperature sensors in multiple locations, airflow management, and preparation for heat-sensitive belongings.
Steam can treat some seams, frames, carpet edges, and furniture when the material tolerates moisture and heat. Federal DIY guidance specifies steam of at least 130°F and cautions against forceful airflow that scatters bugs. Steam works only where it contacts and heats; move slowly, use the correct attachment, avoid electrical hazards, and follow both the steamer and pest-treatment instructions.
Cold is difficult to control in a home freezer. Current federal DIY guidance says a sealed item may be treated at 0°F (-18°C) for three days, verified with a thermometer, while warning that many refrigerator freezers are not cold enough. Thick or insulated items take time to reach the set temperature, and appliances cycle. When in doubt, use a professionally controlled method rather than guessing.
Step 9: Use pesticides only by the label
Pesticide labels are legal directions, not suggestions. In the United States, select an EPA-registered product with bed bugs listed on the label, then follow every site, surface, amount, interval, ventilation, protective-equipment, reentry, storage, and disposal instruction exactly. Elsewhere, use the corresponding registered product system for your jurisdiction.
Never:
- use an outdoor-only pesticide indoors;
- apply more than the label allows or reapply sooner;
- mix products or active ingredients unless the label directs it;
- spray a mattress, bedding, furniture, clothing, pet area, or electrical space unless that exact use is on the label;
- apply a bed bug pesticide or household insecticide to human or animal skin;
- use pool-grade or food-grade diatomaceous earth as a substitute for a registered bed bug desiccant;
- buy unverified pesticide from informal sellers;
- assume “natural” means safe to inhale or spread through a bedroom.
The EPA's specific legal and safe treatment guide warns that outdoor products used indoors can make a home dangerous and that overapplication can poison occupants. If the label conflicts with a website, video, or this article, the label controls.
Resistance and hidden harborages mean repeated use of the same product may fail. Do not respond by increasing the dose. An experienced professional can select compatible methods and registered active ingredients as part of an IPM plan.
Why foggers are not a solution
Total-release foggers, or bug bombs, do not penetrate the cracks and crevices where many bed bugs hide and should not be the sole control method. Misuse can harm health or create fire and explosion risks. Not every fogger is labeled for bed bugs, and more cans are not more effective.
Do not deploy a fogger because a checklist made the rest of the plan feel slow. If a licensed professional includes an aerosol or space treatment, it should be part of a documented method with label-compliant preparation and follow-up—not a substitute for inspection, physical controls, and monitoring.
Step 10: Monitor and follow up
Check interceptors and known harborages every few days at first, then on the schedule in the treatment plan. Record live bugs, location, stage, stains, and dates. Eggs missed during an initial treatment can hatch, and pesticide residuals or repeat visits may be designed to address that interval.
Do not declare success after bites stop. Some people never react, and reactions can be delayed. Use physical evidence and the professional's monitoring criteria. Keep encasements and interceptors in place for the directed period; do not remove them early because the room looks quiet.
If activity continues, contact the professional before adding products. Treatment failure may reflect missed areas, preparation gaps, reintroduction, resistance, untreated neighboring units, or misidentification. Each cause requires a different correction.
What DIY work can and cannot do
Residents can contribute powerfully by documenting evidence, reducing clutter without spreading it, bagging and heat-treating dryer-safe items, vacuuming carefully, installing encasements and interceptors, following preparation instructions, and maintaining monitoring records.
DIY becomes unrealistic when the infestation is established, extends beyond one small area, recurs after treatment, involves a multi-unit building, occupies inaccessible structure, or the household cannot safely execute the preparation. It is also inappropriate when pesticides, high heat, electrical areas, significant furniture disassembly, or vulnerable occupants raise the risk.
Skin reactions should be handled separately; the bite guide explains why skin marks cannot confirm eradication and when to contact a clinician. If the suspected exposure began on a trip, use the hotel and luggage protocol to keep the response from spreading into additional rooms.
The realistic endpoint
Successful bed bug control is the sustained absence of confirmed insects and physical signs under an agreed monitoring plan—not one pesticide application, one quiet week, or one person no longer itching. The process can take time, and needing professional help is normal.
Confirm first, contain movement, combine compatible methods, follow every pesticide label, and keep inspecting. A calm, documented IPM plan is slower than a miracle claim and far more likely to protect both the household and the treatment result.